Crafting custom furniture handles is a meticulous and rewarding process that allows you to infuse your unique style and creativity into your furniture pieces. Here’s a step-by-step guide to help you master the art of making custom furniture handles:
1. Design Concept:
Start by conceptualizing the design of your custom handles. Consider the style of your furniture, the wood species you’re using, and any decorative elements you want to incorporate.
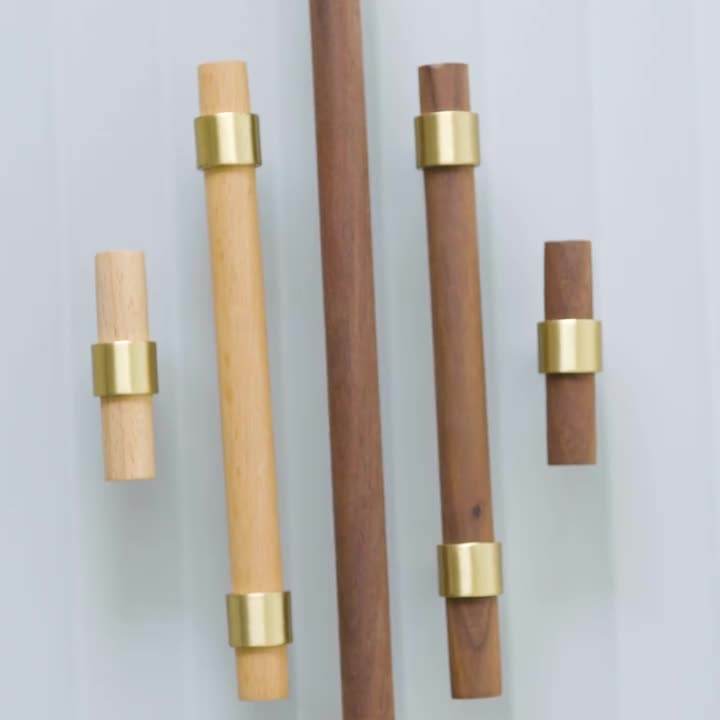
2. Material Selection:
Choose a high-quality wood species that suits your design and provides the desired aesthetics. Consider factors like color, grain pattern, and durability.
3. Gather Tools and Materials:
Collect the necessary tools for woodworking, such as chisels, carving knives, saws, sandpaper, drills, and measuring tools. Ensure you have a safe and well-equipped workspace.
4. Wood Preparation:
Prepare the wood by cutting it to the desired length and width for the handles. If your design involves carving or shaping, mark the areas where you’ll be working.
5. Carving and Shaping:
Use carving tools to shape the wood according to your design. Pay attention to details and create smooth, clean lines. Carve out any patterns, motifs, or textures you’ve planned.
6. Sanding and Smoothing:
Sand the handles to achieve a smooth and polished finish. Start with coarser grit sandpaper and progress to finer grits for a refined result. Sanding also helps to round out edges for a comfortable grip.
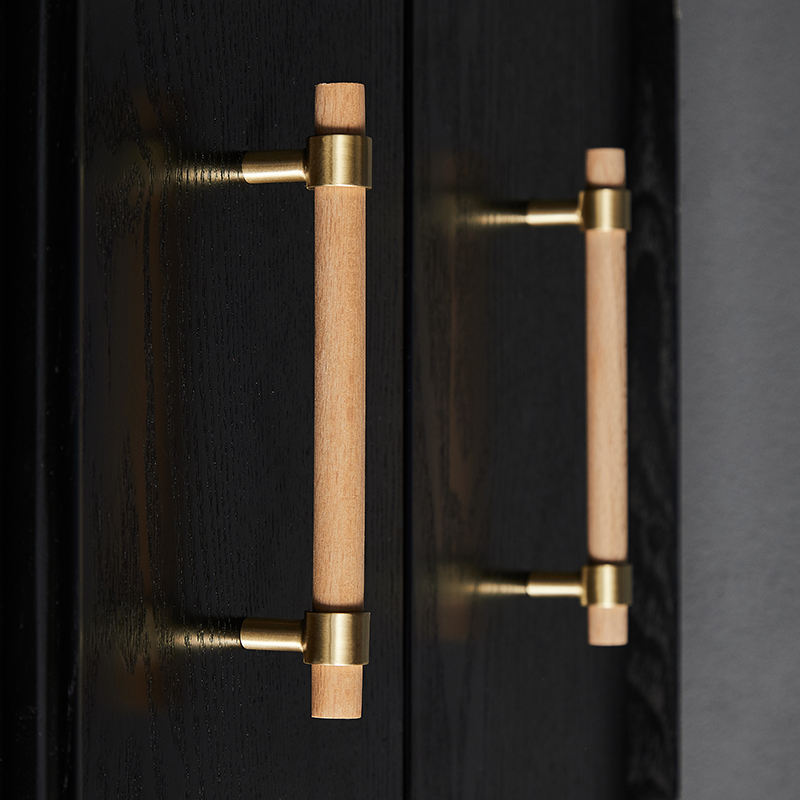
7. Finishing Touches:
Apply a suitable finish to enhance the wood’s appearance and protect it from wear. Choose a finish that aligns with your desired aesthetics, such as varnish, oil, or wax. Apply multiple coats as needed, following the manufacturer’s instructions.
8. Hardware Preparation:
If your handles require hardware such as screws or bolts, ensure you have the appropriate size and type. Pre-drill holes in the handles for attaching the hardware securely.
9. Test Fitting:
Before attaching the handles permanently, test-fit them on your furniture to ensure they align well and are comfortable to grip. Make any necessary adjustments.
10. Attaching the Handles:
Once you’re satisfied with the fit and design, attach the handles to your furniture. Use the pre-drilled holes and appropriate hardware to secure them firmly in place.
11. Inspection and Finishing Checks:
Inspect the handles and furniture for any rough edges, splinters, or inconsistencies. Make sure the handles are securely attached and function smoothly.
12. Showcase Your Work:
Display your custom handles proudly on your furniture. Share your work on social media, in woodworking communities, or with friends and family who appreciate craftsmanship.
Remember that crafting custom furniture handles requires patience, practice, and a dedication to detail. Each handle you create is a reflection of your skill and creativity, making your furniture pieces truly unique and personalized.